Search This Blog

Showing posts with label veggies. Show all posts

Friday, May 8, 2015

Growing Dome May 2015

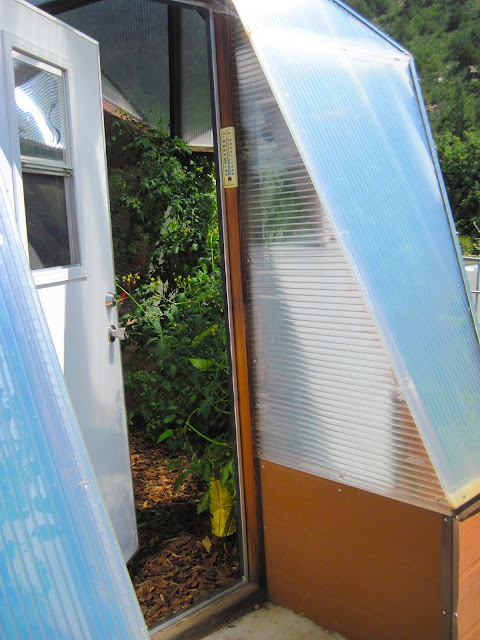
My winter and spring haven is inside the Growing Dome, a snug, warm place when outside the wind is howling and temperatures are below freezing.


I have fun trying new veggie varieties, so in some ways the dome is like a laboratory. My dad often said, "Let's see what happens!" so that's what I do.

Below are Kalettes, a new brussels sprouts-kale hybrid, almost ready to pick. The little rosette in the center of the leaves are the Kalette part. The leaves look like normal kale, so I'll let you know how I end up cooking this lab experiment.


Just past the Kalettes are some new lettuce seedlings and Royal Burgundy green beans.

Here's a chard jungle. Everyone who visits or whom I visit, receives a bouquet of rainbow chard. Want a good chard recipe? Here you go.


 We've been eating lots of sugar snap peas. Our summer weather is cool, so more sugar snaps will be planted this week for the outside garden.


 The carrots aren't ready yet, but look good.


I'm trying for more flowers in the dome because they add color to the space.


Some pretty peonies.

And Trudy, look at the pomegranate plant you gave me a year ago Christmas! I didn't kill it.


One problem with growing inside are bug critters. In the past the dome has been host to aphids, white flies, and some black gnat-like annoyances who lived in the soil. We learn from our mistakes, one which was planting stuff too close together and allowing the soil to become too damp. Everything needs to dry out now and then to keep the creepies at bay. Right now I am playing host to crickets and roly polies, but they are manageable.

Two years ago was whitefly summer and the tomato plants slowly had their lives sucked out of them. I removed the affected plants, but it was just too late and those pests just never went away.  I ended up removing every plant and giving the dome a much needed airing out before replanting.

This year I am trying something new: the tomatoes are in Smart Pots, so if there is an infestation, I can remove the affected plant more efficiently. This looks like a good idea for peppers, since they seem to attract aphids.


So far, the tomatoes are growing well in their bags. I used a mixture of compost and potting soil and they will need trellising very soon.

I hope you enjoyed the update. Happy gardening!


Friday, July 4, 2014

Summer At The Nickel and Dime Ranch


Happy 4th of July and Fiestas Weekend!

We had some crazy hail and drenching rain yesterday. The day started out without a cloud in the sky, the temperature a nice 82 degrees. I was in Las Vegas and saw clouds gathering over our place and called Tom, but he wasn't answering. Now I know why.

Ms. Pearl did not like it one bit. It was crazy and insane!

The hail did a number on the outside garden. It looks kind of like someone took a golf club and did some swinging.

The green beans were the worst, but we will just have to see if they recover. I have veggies in the Growing Dome, so all is not lost. 

The flower garden looks like it did last week when I took this pic.

Just another summer day in Northern New Mexico.


Wednesday, September 11, 2013

Scrambled Eggs with Kale, Tomatoes, Onions and Guacamole

The other morning I had brunch at The Tune Up Cafe in Santa Fe where I devoured an egg dish with guacamole as one of the ingredients. I've had eggs with sliced avocado, but never guac. Its garlicky, oniony essence made my breakfast hover above all the others in the recent past.

Luckily, I had some guacamole at home the other morning, so I decided to levitate my own breakfast and make something akin to what I had at the Tune Up.

Veggies in the pan, ready for plating. The yellow tomato is a German Gold, I think.

Scrambled Eggs with Kale, Tomatoes, Onion and Guacamole 

Serves 1


Ingredients

1 T plus 1 t olive oil (divided)
1/4 medium onion, chopped
3 large kale leaves, minus the center ribs, chopped into teeny tiny pieces
1/4 c chicken or vegetable broth
1 medium tomato, chopped
seasoned salt and pepper to taste
1/4 c (or more) of your favorite guacamole
2 eggs and two whites (Give the two extra yolks to the cat. Make the dog sit and watch until cat is done. Then let the dog have what's left.)

1. Cook onion in olive oil on medium heat until the onion looks translucent.
2. Add the kale pieces to the onions. Saute this for a minute or two.
3. Pour in the broth and let the liquid cook away, about two or three minutes.
4. Add the chopped tomatoes and cook just until the tomatoes are warm. Add seasoned salt to taste. I like Goya Adobo salt.
5. Remove veggie mixture from the pan to a plate or bowl. Keep warm.
6. Add 1 t olive oil to the pan.
7. Scramble your eggs whatever way you like. Just before they are done, spread the guacamole on the veggie mixture on your plate.
8. Top with the scrambled eggs. Add green or red chile, shredded cheese or anything else you might like that I didn't include.

Enjoy!


Monday, September 2, 2013

Raised Beds and Growing Dome Update-Late Summer 2013

Back in June, Mike Salman and his crew were building the raised beds which replaced the grass in the side yard. I wanted the veggies growing close and inside the stucco wall to discourage critters and because I am lazy. I like lettuce grown just a few steps from the house.


Even though it was almost a full month late, I decided to plant the stuff I had started in the dome.Why not, I figured. There was no room in the dome, so out they went.

I planted tomatoes, kale, cabbage, peppers, lettuce, carrots and purple green beans. There are also three melon plants with no melons.


Here are the green beans, called Royal Burgundy. When you cook the purple beans, they turn green. I like them because my dad always planted them and they're easy to find when it's time to pick. Today's the first picking of the outside beans! Yay!


I haven't killed the flower garden, yet.


Over in the Growing Dome it's a tomato jungle inside. I planted fewer tomato plants this year since they overwhelmed the other plants.


But they still crowded and covered the basil, cucumbers, peppers and one last crop of indoor green beans.


The other side is crazy, too. Note to self: You may need to revisit how to corral the tomatoes.


And it's the lonely, empty bee yard.  I saw their new mom yesterday, though, and she says the bees have easily adapted to their new terroir, which makes me happy.


Late summer looks pretty good, don't you think?


Friday, June 21, 2013

In Progress-Raised Bed Veggie Garden and Perennial Bed

When we moved from Southern California to our cabin here in Northern New Mexico, it was the first time we had a lawn. The little house where we lived for 30 years had a heavily shaded ivy and dirt yard and not much grew in that deep shade, so no grass and no flowers. On the sunny side of the house we grew a veggie garden, but the only flowers I planted were marigolds to help protect the tomatoes.

The cabin here at the Nickel and Dime is surrounded by lawn. It is beautiful, restful and green, but I realized that my 18 foot Growing Dome can only hold so much and I wanted to be able to grow more stuff. So the south lawn is being converted to raised beds along with a bee and hummingbird friendly perennial garden.

Here's what we have so far:


Above is a long view of three beds already made and three waiting for their lumber. There will be 6-12 by 4 foot beds and 3-4 by 4 foot beds. Wow.

Here's how the beds are prepared: The lawn was dug away and leveled where the bed would stand. Weed barrier cloth and then a staggered double layer of chicken wire are laid in the bottom. We have a gopher problem, thus the chicken wire. I wanted hardware cloth, a heavy duty half inch mesh, but the cost was insane. So the chicken wire is staggered to make the holes smaller and I will hope that is enough discouragement.


Sticking up out of the ground is poly hose with a threaded end. I decided to screw on a soaker hose rather than use emitters because I have more watering choices that way.

The wood is 4 inch by 6 inch by 12 foot treated timbers stacked three high. At that height I can sit on the edge and not have to crawl around on the ground when planting.


The timbers are secured on the inside with corner brackets and straight brackets. The sides are lined with more weed barrier cloth to preserve moisture.

So why do I have raised beds? Well, I am lazy, that's why. Weeds are more easily controlled in raised beds with weed barrier cloth and I can mix the soil by adding bagged planting mix and ranch dirt. There are composted raspberry canes in there, too. If I don't like the soil I can add some bagged mix to the bed. Plus, if I wander around a bit I can start a cow pie collection and have some nice manure, as well.

The bunnies who hang out in the yard don't climb, so my lettuce should be safe. Don't get me started on ground squirrels, though.

When I plant lettuce in this garden, though, I will probably add some PVC hoops and row cover to protect the little seedlings from hungry birds and other marauders.

Here is a shot of the perennial bed running the length of our deck. The plants are still small, but they seem to like it there.


Underneath the gravel are weed barrier cloth and drip emitters to each plant. I was excited to see hummingbirds almost as soon as the plants were in the ground. 

Surrounding the raised veggie and strawberry beds is more weed barrier cloth which will be covered with bark. 

The garden is finally coming together and although it may be too late to plant everything I would like to grow, I will have plenty of time to do more research to see which plants would do best up here in the mountains at 7400 feet.

Friday, March 29, 2013

Growing Dome Report: Early Spring 2013

Early spring in Northern New Mexico is not pretty. Everything still looks dead and three years ago when we first moved here, this SoCal gal wondered if any of the plants, trees, or grass would ever come back.

Looking north toward the cabin and Growing Dome

Temps are still as low as 3 degrees with highs in the 30's or 40's. The wind howls and it sounds like the roof is going to be ripped off. It's times like these that I remind myself that summer will be in the temperate 70's and 80's and not over 100F for weeks like at our old home.

The Growing Dome is the place to be during times like these. With the sun shining it's in the 70's and 80's which makes it cozy to sit in the Adirondack chair, read, listen to the wind, and watch stuff grow.


Below is the eastern side of the dome. I planted most of this stuff in late September. We ate lettuce, radishes, carrots, chard and kale throughout the winter.

Cast of characters here: kale, onions, rainbow chard, carrots and broccoli rabe.

Here are some closeups:

Broccoli Rabe

Carrots, rainbow chard, and red stalk celery

The radishes look as pretty as their picture.
I just bought a Meyer lemon tree. In the background are some EarthBoxes. Box 1: spearmint, Box 2: rosemary in the back and cilantro sprouting in the front, Box 3 (which you will just have to imagine): lemon thyme in the back, basil in the front. The rosemary and lemon thyme are a year old now.


The west side of the dome has been my lettuce garden and it's almost done and I have to wash off the aphids before we eat the leaves. I know, "Yuck!" But there's some protein there, I guess. I've been keeping the aphids in check with insecticidal soap which works if I keep at it.

Some of the sugar snap peas are ready to pick.


And I have one last crop of snap peas waiting in the wings. These were planted late February.


Pretty soon it will be time to plant the warm season crops: beans, tomatoes, cukes are number one on the list. Yay!

And here's another Yay!  We will be adding some raised beds where the south lawn is, so I can grow more stuff outside! We don't need that much lawn and why not have a potager (kitchen garden) just outside your house?

Happy Spring, everyone!


Tuesday, October 9, 2012

Potato Famine

My Irish ancestors must be rolling around in their graves right about now. I harvested my potato crop and this is what I got:


  Potato salad for one, anyone?

Sunday, May 20, 2012

Chard is Actually Good! A Simple Chard Recipe

In the 1960's when I was growing up, most veggies at our house came from a can. Peas and green beans were a grayish green and spinach looked like elephant snot (at least that's what I told my mom when she served it.) I loved canned carrots. Go figure.

 Both our parents worked, so there was no veggie garden in the back yard and the only farmers' market nearby was the Japanese market on the way to the beach where we would buy strawberries in the spring and corn during summer. And, of course, we had those country green beans that were cooked all day. Yum! But chard? What was that?

I didn't know anything about chard until a few years ago and I didn't eat it until last week. What can I say? I was a deprived child! I don't have chard in my garden yet, but when it's time to plant cool weather veggies in the Growing Dome, you can bet I will. Kale is growing in the dome right now, but kale is for another post.

Anyway, the rainbow chard at the healthy foods market in Taos was so pretty I bought some. MBB eats that stuff all the time and I hate when my kid is one up on me, and it is well known that chard is a nutritional powerhouse full of antioxidants and vitamins, so sign me up.


Plus, isn't this chard pretty?

It reminds me of spinach, so after reading around a bit and also remembering how my dad made our canned spinach palatable by adding a few drops of vinegar, I came up with this recipe.

Sauteed Chard With Garlic and Balsamic Vinegar

Ingredients
2 T olive oil
2 cloves of minced garlic
1 washed bunch of chard, leaves stripped from the stalks, cut into wide strips (I chopped the stalks to use for soup)
2 T balsamic vinegar
salt and pepper to taste

Directions
1. Heat a large skillet over medium heat, add the olive oil.
2. When the olive oil is shimmery, add the chard.


 3. Using tongs to turn the chard in the pan, cook for about five minutes until the chard is almost wilted. Add the chopped garlic to the pan. 

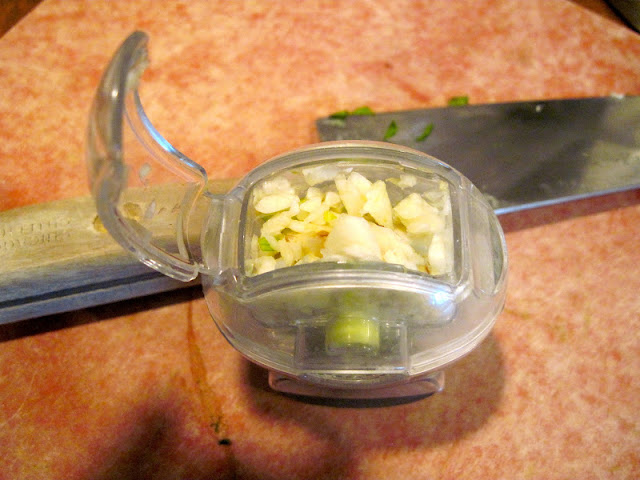
Below is the garlic in my favorite chopper, the Garlic Zoom. The photo after that shows the chard and garlic hanging out.


4. Once you've added the garlic, cook for a minute or two more and then add the balsamic vinegar. Toss it around so the chard is coated with the vinegar. (Don't cook too long or the chard will look like elephant snot.) Add some salt and pepper to taste.

And that's it!

Optional: Toast a couple tablespoons of pine nuts and sprinkle them on top.

I can't believe how much I liked chard after eating this! What in the world was I waiting for?