A couple weeks ago I was at our local Mora Farmer's Market and the weather was unseasonably cool, in the 50's. Everyone was bundled up and there wasn't a pair of shorts in sight. Peggy, one of the farmers, said, "It's a reminder to get your wood in!"
We've been working on that.
Almost everybody uses wood heat around here. This is a common sight, although there's usually a dog of some sort riding on top of that load.
In town, the cool breezes carry the sharpspicysmoky scent of roasting chiles. The folks who tend these baskets with their fiery heat will roast the chiles you choose in nothing flat. You can find them on street corners, in front of grocery stores, and at the fancy mall in Albuquerque. The smell of roasting chiles is a reminder to get your chiles in. So okay, that's what I will do.
People line up for their favorite roasters selling their preferred chiles: Socorro, Hatch, Rocky Ford are all represented around here. I've been buying Socorro chiles from a crack team of roasters led by a man in a wheelchair.
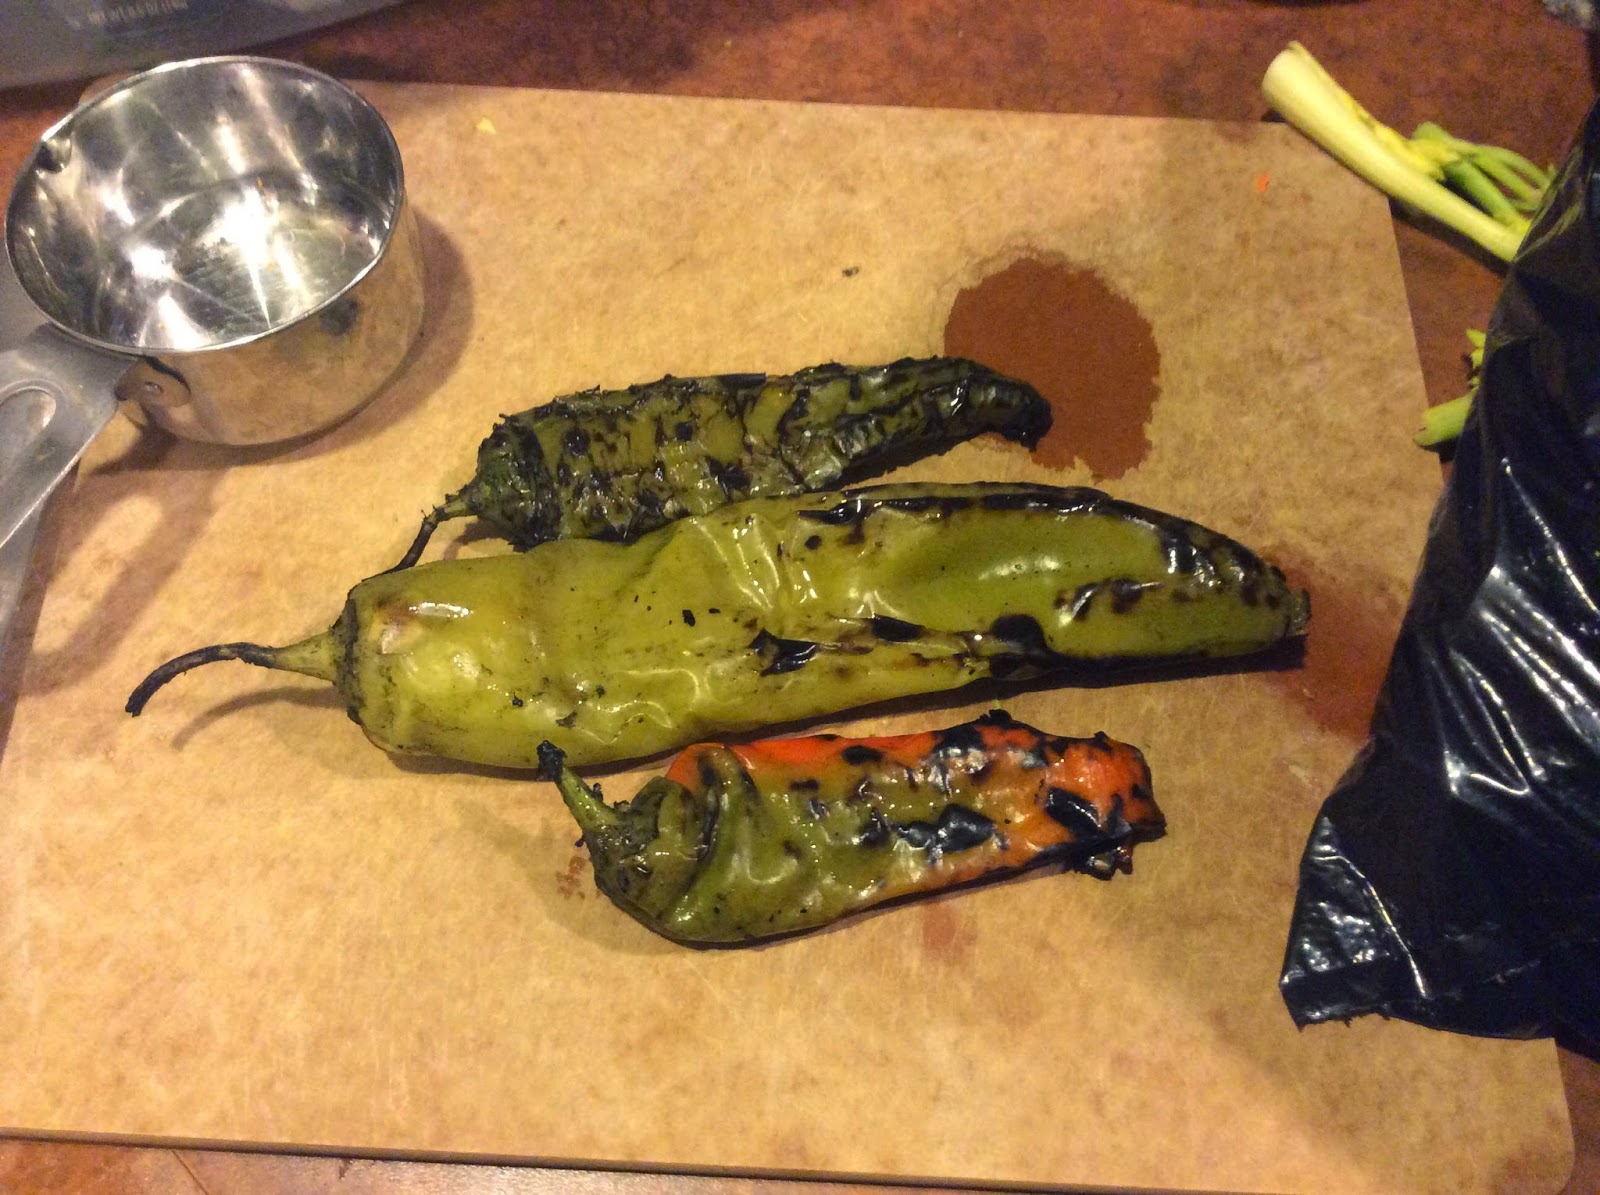
When the chiles are done, they are shoveled into a heavy duty plastic bag (I suppose there is BPA there but I will pretend not). Inside, it looks like an inferno happened. At first I was kind of, "Ewww!' but they smell so good.
I split 40 pounds with a friend, so we each left the chile roaster with 20 pounds of chiles. At home I removed chiles from their black bag a handful at a time and packaged them in smaller plastic storage bags.
This year I listened to friends who said, "Don't peel or seed them, just put the chiles in the bags and do all that when they're defrosted." So I defer to experience, and it was a lot faster and easier this time around.
What will I make with all this green chile?
Here are a few links to my favorite green chile recipes:
Pie Town's Famous Green Chile Apple Pie
Grilled Cheese and Green Chile Sandwich
Green Chile Mac and Cheese
While I was at the post office today I noticed the aspens up higher in the mountains are turning yellow, another reminder that autumn is here. I didn't take this photo, but if you are near Taos, you are in for a big show.
Happy Autumn!
Two retired high school teachers from Southern California move to a 100 acre ranch in rural Northern New Mexico. Why the name? This place nickels and dimes us to death, but we wouldn't have it any other way.
Search This Blog
Showing posts with label recipes. Show all posts
Tuesday, September 30, 2014
Sunday, December 1, 2013
Don't Toss That Turkey Carcass!
It would be a sacrilege to toss the turkey carcass without getting as much as possible from your investment. This year we bought an intensively raised, grass grazed, free range designer turkey, so we really wanted to get our money's worth. That turkey cost as much as the budget for a small town!
After Thanksgiving dinner, we had Friday leftovers: sliced turkey for sandwiches and all the stuffing, rice, mashed potatoes, green beans, roasted butternut squash, beet and arugula salad and gravy we wanted to eat.
But there was still meat left on that turkey carcass. This is a stock photo, but you get the idea.
![]() | |
http://www.embudovalleyorganics.com/about/ |
But there was still meat left on that turkey carcass. This is a stock photo, but you get the idea.
So I found a cooking show to watch while I dismembered the turkey. I broke the thighs and wings off the bird, picked the bones clean, flipped it over and over, scouring that lovely bird for all it would offer.
There was much more dark than light meat, and I used quart freezer bags to save 2 cup servings of all my pickin's.
Into small snack bags went skin and other yucky stuff (no bones) to add to Ms. Pearl's dinner: not so much that she has a digestive upset, just a little yum to add to her senior dog food.
Here's what I got:
But we weren't done. The carcass, complete with the stuff I had used in the turkey's cavity for Thanksgiving roasting, apples, onions, tangerines and rosemary sprigs, went into the stock pot for a leisurely slow boil lasting about an hour and a half. Since I had brined the turkey, I didn't add any salt. After I removed the carcass from the broth, I strained it and picked more meat from the rescued bones.
From the stock, daughter M made some Turkey Barley Soup. She added extra mushrooms and because we ran out of celery and are not near a store, sliced some chard ribs into the soup and added some celery seed. The leftover white meat and some of the dark meat I had gleaned after the simmer went into the soup toward the end of the cooking time.
The rest of the meat is in the freezer now, waiting for its reappearance.
For your inspiration, here are a few recipes that use either leftover turkey or cooked chicken. Cooked turkey and chicken are interchangeable at our place.
White Chicken Posole (Skip browning the chicken and add your turkey toward the end of the cooking time)
Enjoy!
Tuesday, October 8, 2013
Apple-Golden Berry Blend Crumble (Grain and Gluten Free)
Through a lot of trial and error, I recently came to the conclusion that items made with wheat flour were causing me to have acid reflux. After eliminating most baked goods, wheat pastas and breads from my diet, not only did the reflux disappear, but so did the joint pain I have had for years in my knees and shoulders. Score!
One day this past summer I had a big plate of pasta at a relative's home which tasted ohsogood, yet the next day my knee and shoulder joints were killing me. So now I know.
Anyway, I needed to make something for the Sangre de Cristo Livestock Growers' meeting potluck and found some canned apples in the pantry. Okay, apple crisp it was.
I'd been using almond meal as a substitute for flour when frying, so that's what I used for the topping instead of flour and oats.
Later at the Livestock Growers' meeting, a big old pan of apple crisp disappeared in no time at all and I spied someone using their finger to scoop up some of the leftovers from the corners of the pan. It's that good.
Here's the recipe. Since not all of you have canned apples in your pantry, I've used fresh ones since they're easy to find.
Apple-Golden Berry Blend Crumble (Grain and Gluten Free)
(4-6 servings)
Ingredients
(for the apple layer)
2 large tart apples or 3-4 medium apples, sliced (or the equivalent in canned apples-not apple pie filling, well-drained)
1/2 cup Trader Joe's Golden Berry Blend (golden raisins, dried blueberries, dried cherries and dried cranberries or the equivalent in other dried fruits)
2 T honey
2 T lemon juice
1T arrowroot powder or substitute cornstarch
1 t cinnamon or pumpkin pie spice
Ingredients
(for the crumble layer)
1 cup almond flour
1/2 cup shredded unsweetened coconut
1/2 cup chopped nuts, your choice
1/4 t ground ginger
1/4 t ground nutmeg
a dry sweetener like stevia (I used maple sugar) to taste, about 1 T
1/4 cup melted coconut oil, divided
Directions
Preheat oven to 375 degrees
For the apple layer
1. Place apples and dried fruit in 2 quart baking dish. Drizzle honey and lemon juice over the top.
2. Add the arrowroot powder or cornstarch and cinnamon and toss everything together in the dish.
3. Pour 1 T of the melted coconut oil evenly over the apple mixture.
For the crumble
4. In a small bowl mix the almond flour, coconut, nuts (I used pine nuts because we are in New Mexico), ginger, nutmeg and sweetener. Pour the remaining melted coconut oil over this stuff and mix until it is crumbly.
5. Spread the crumble topping over the apple mixture. It will be a thick layer.
6. Cover with foil and bake for 25 minutes. Remove the foil and bake for an additional 10 minutes until the apples are tender and the top is golden brown.
Just so you know, this makes an excellent breakfast dish, too.
Note: I love Trader Joe's, which will have all the stuff you need to make this. If you don't have a TJ's, a Sprouts market or your grocery store's healthy food section should suffice.
Wednesday, September 11, 2013
Scrambled Eggs with Kale, Tomatoes, Onions and Guacamole
The other morning I had brunch at The Tune Up Cafe in Santa Fe where I devoured an egg dish with guacamole as one of the ingredients. I've had eggs with sliced avocado, but never guac. Its garlicky, oniony essence made my breakfast hover above all the others in the recent past.
Luckily, I had some guacamole at home the other morning, so I decided to levitate my own breakfast and make something akin to what I had at the Tune Up.
Scrambled Eggs with Kale, Tomatoes, Onion and Guacamole
Serves 1
Ingredients
1 T plus 1 t olive oil (divided)
1/4 medium onion, chopped
3 large kale leaves, minus the center ribs, chopped into teeny tiny pieces
1/4 c chicken or vegetable broth
1 medium tomato, chopped
seasoned salt and pepper to taste
1/4 c (or more) of your favorite guacamole
2 eggs and two whites (Give the two extra yolks to the cat. Make the dog sit and watch until cat is done. Then let the dog have what's left.)
1. Cook onion in olive oil on medium heat until the onion looks translucent.
2. Add the kale pieces to the onions. Saute this for a minute or two.
3. Pour in the broth and let the liquid cook away, about two or three minutes.
4. Add the chopped tomatoes and cook just until the tomatoes are warm. Add seasoned salt to taste. I like Goya Adobo salt.
5. Remove veggie mixture from the pan to a plate or bowl. Keep warm.
6. Add 1 t olive oil to the pan.
7. Scramble your eggs whatever way you like. Just before they are done, spread the guacamole on the veggie mixture on your plate.
8. Top with the scrambled eggs. Add green or red chile, shredded cheese or anything else you might like that I didn't include.
Enjoy!
Luckily, I had some guacamole at home the other morning, so I decided to levitate my own breakfast and make something akin to what I had at the Tune Up.
![]() |
Veggies in the pan, ready for plating. The yellow tomato is a German Gold, I think. |
Scrambled Eggs with Kale, Tomatoes, Onion and Guacamole
Serves 1
Ingredients
1 T plus 1 t olive oil (divided)
1/4 medium onion, chopped
3 large kale leaves, minus the center ribs, chopped into teeny tiny pieces
1/4 c chicken or vegetable broth
1 medium tomato, chopped
seasoned salt and pepper to taste
1/4 c (or more) of your favorite guacamole
2 eggs and two whites (Give the two extra yolks to the cat. Make the dog sit and watch until cat is done. Then let the dog have what's left.)
1. Cook onion in olive oil on medium heat until the onion looks translucent.
2. Add the kale pieces to the onions. Saute this for a minute or two.
3. Pour in the broth and let the liquid cook away, about two or three minutes.
4. Add the chopped tomatoes and cook just until the tomatoes are warm. Add seasoned salt to taste. I like Goya Adobo salt.
5. Remove veggie mixture from the pan to a plate or bowl. Keep warm.
6. Add 1 t olive oil to the pan.
7. Scramble your eggs whatever way you like. Just before they are done, spread the guacamole on the veggie mixture on your plate.
8. Top with the scrambled eggs. Add green or red chile, shredded cheese or anything else you might like that I didn't include.
Enjoy!
Thursday, May 16, 2013
Stalking the Wild Asparagus in Northern New Mexico
The other day someone mentioned that her young friends were foraging for fruit and wild veggies grown on public lands or from branches hanging over fences on public property. There's an app for that, did you know? Wildman Steve Brill leads foraging tours through Central Park in New York, but don't actually pick anything or you might get arrested.
So friend Betsy asked if I'd like to search for wild asparagus. Our first outing last week was a bust: we clomped around in a boggy area behind the Catholic church in a local town, but someone had been there before us. All we got was wet: it was a misty moisty morning.
The other day, though, we spent some time strolling along an acequia (water ditch) looking for the elusive wild asparagus. Betsy is an expert asparagus spotter and showed me how to find the tall stalks poking up from the earth. She is a relentless searcher and this time it paid off.
Wild asparagus grows along water sources or places that get some moisture: water ditches and fence lines seem to be the most likely spots around here. In the photo below, you can see the acequia just beyond the barbed wire fence.
As luck would have it, we found a fair number of asparagus spears growing on the far side of the fence which required careful reaching. One would hold the fence wire up while the other forager reachedreachedreached until she could snap off those tender stalks. Since some of the spears were almost going to seed, we left those. We foraged until thunder and lightning and some big rain drops told us to cut it out.
Betsy and I divided up our haul and each left with enough asparagus for a meal and a promise to meet again next week to look for some more.
Tom said it was much better than the stuff from the store and yes, it was tender and sweet, just like he is ;).
Sauteed Asparagus With Garlic (Serves 2)
Ingredients
1 handful asparagus (it doesn't have to be wild)
2 T butter
1-2 cloves garlic
Directions
1. Melt the butter in a medium skillet over medium-high heat and add the asparagus and garlic.
2. Cover the pan, lower the heat, and cook for about 5-10 minutes, depending on the thickness of the stalks. Pick up a piece of asparagus from the pan and bite into it. If you can bite through but it's still just a little firm, it's done.
Promise to cook your asparagus just until it's bright green. If you cook it until it's a grayish green, then it will be like that canned stuff my mom tried to feed us.
So friend Betsy asked if I'd like to search for wild asparagus. Our first outing last week was a bust: we clomped around in a boggy area behind the Catholic church in a local town, but someone had been there before us. All we got was wet: it was a misty moisty morning.
The other day, though, we spent some time strolling along an acequia (water ditch) looking for the elusive wild asparagus. Betsy is an expert asparagus spotter and showed me how to find the tall stalks poking up from the earth. She is a relentless searcher and this time it paid off.
Wild asparagus grows along water sources or places that get some moisture: water ditches and fence lines seem to be the most likely spots around here. In the photo below, you can see the acequia just beyond the barbed wire fence.
Betsy and I divided up our haul and each left with enough asparagus for a meal and a promise to meet again next week to look for some more.
Tom said it was much better than the stuff from the store and yes, it was tender and sweet, just like he is ;).
Sauteed Asparagus With Garlic (Serves 2)
Ingredients
1 handful asparagus (it doesn't have to be wild)
2 T butter
1-2 cloves garlic
Directions
1. Melt the butter in a medium skillet over medium-high heat and add the asparagus and garlic.
2. Cover the pan, lower the heat, and cook for about 5-10 minutes, depending on the thickness of the stalks. Pick up a piece of asparagus from the pan and bite into it. If you can bite through but it's still just a little firm, it's done.
Promise to cook your asparagus just until it's bright green. If you cook it until it's a grayish green, then it will be like that canned stuff my mom tried to feed us.
Monday, April 22, 2013
Chicken Spaghetti-Another Comfort Food Favorite
Chicken spaghetti is a recipe I had never heard of until it popped up on my radar just after we moved to our place in New Mexico. It's one of those Texas recipes, I guess, because I recently internet searched for chicken spaghetti and Texas, and found many versions of this comfort food casserole.
Ree Drummond of The Pioneer Woman fame, has an excellent chicken spaghetti recipe on her website and it's hers I tried first. It's still my go-to recipe for guests, creamy and savory, with just a little spicy bite at the finish.
Last week, though, I needed to take a main dish to the Sangre de Cristo Livestock Growers' monthly meeting and couldn't get to a grocery store. In the fridge was half a rotisserie chicken and in the freezer were two broiled chicken breasts. I had cream of mushroom soup and there was half a block of Velveeta cheese food. I was good to go.
It isn't as good as Ree Drummond's Chicken Spaghetti, but it worked well enough that someone at the meeting asked, "Is that an Alfredo sauce in there?" And I answered, "Yes, Campbell's Alfredo."
Ro-Tel Chicken Spaghetti (Serves 6-8)
Ingredients
12 ounces spaghetti, cooked and drained
2 cups cooked chicken, chopped
1 can cream of mushroom or cream of chicken soup
1 can Ro-tel tomatoes (I used medium spiciness)
1 can chicken broth
1 lb Velveeta cheese, cubed
Directions
1. Boil water and cook your spaghetti. Drain your spaghetti into a colander and leave it there while you do the next step.
2. Mix the chicken, soup, tomatoes, and chicken broth in the pan you used to cook the spaghetti.
3. Add the spaghetti and cubed cheese. Mix that baby up so the cheese cubes are well distributed within the mixture.
4. Put a little olive oil on a paper towel square and grease a 13 by 9 inch pan. Or spray it with your oil stuff. Pour the spaghetti mixture into the pan.
5. Cover with foil and bake at 350 degrees for 30 to 45 minutes until it's warm and bubbly. You can take the cover off the last 15 minutes if you like a little browning on the top.
6. When you take the pan out of the oven, give it a stir to ensure the cheese is evenly distributed.
Sadly, there are usually no leftovers.
Saturday, February 2, 2013
Friday, February 1, 2013
Trader Joe's Brussels Sprouts, Back Again
I did this post a little over a year ago, but Pattilou asked for a brussel's sprouts recipe, so here it is again.
If you don't have brussels sprouts on the stem, that's okay, just combine your maple syrup and olive oil in a medium bowl. Then toss the brussels sprouts in there, too, and move them around until they are nicely coated. Put them on your oiled or parchmented cookie sheet and bake as instructed.
Here is is the post:
A few weeks ago I was having an adventurous time at Trader Joe's. It was the Friday before the New Years' weekend and the place was packed! We were like Trader Joe's sardines, but sardines that talked: "Excuse me, pardon me, whoops, should have signaled! Sorry, did I just run over your foot? I mean, your fin?"
A sidebar: The Santa Fe Trader Joe's has a significant number of shoppers wearing black clothing and black berets. It must be the artsy influence.
Okay, back to the story. In the produce area a large crowd was gathered around a table, exclaiming, "I've never seen that before! So that's how they look!" They were talking about Brussels sprouts still on their stalks, like natural, man.
I bought a stalk for nostalgic purposes because once I had grown Brussels sprouts and I now had some just beginning to poke up through the dirt back home in the Growing Dome.
When I got home I planned to cut them off the stalk and roast them like I usually do, tossing them in olive oil, salt and pepper, and leaving them in the oven at 450 degrees for 15 minutes. They are lovely like that.
But I saw something dangling from the end of the stalk and it was a recipe from Trader Joe. So I decided to give it a try.
First I rinsed the stalk of sprouts, wrapped the wet stalks in plastic wrap and microwaved them for about 3 minutes. I think that's to par cook them before roasting. Below is a photo of how I wrapped the stalk to preserve the heat and moisture from washing them.
Please excuse the old Silpat mat. I need to buy a new one.
In
a small bowl I mixed 1/2 cup maple syrup (I used the real stuff) with
1/4 cup olive oil. I unwrapped the sprouts, discarded the plastic wrap
and brushed the maple syrup/olive oil mixture over them. I sprinkled
them with salt and pepper to taste.
I
baked them at 400 degrees for 20 minutes. They came out nicely roasted,
with some of the outer leaves crispy, which I like, with a slightly
sweet taste.
Here's how they looked out of the oven: Look at how the syrup has caramelized a bit.
You
can serve them like this and your diners can hack off what they want
from the stalk, Henry the 8th style, or you can do the honors and serve
in a dish.
I
love roasting Brussels sprouts. They have a nutty, slightly sweet taste
that is not at all like your Irish mother's sprouts which were boiled
within an inch of their lives.
Enjoy!
Monday, December 31, 2012
White Chicken Posole
We arrived at the Nickel and Dime last night at 11 p.m., road weary but happy to be back. Visiting relatives and friends in SoCal is always fun, but there's a sigh of relief as we turn onto the dirt road for the final miles to our place. I flipped off the radio so we could have some blessed silence as we made our way home. Ten hours of satellite radio will do anyone in. Just saying.
We came home to temps in the 20's, dropping into the single digits tonight and tomorrow. Today I did a little Facebook catching up and saw a friend's abuelita (grandma) making posole for New Year's. Ahh. Posole and a grandma making soup for the holidays is something special and worth memorializing anywhere. I could almost smell the chiles and the comforting broth and thought, "Dang, I want some of that!"
Posole, sometimes spelled pozole, is a lightly spiced, hominy soup made with pork or chicken, but here I've opted for chicken. With the added garnishes, it makes a satisfying lunch or dinner and not just for the holidays.
This recipe is a quick and easy version, so you should be done cooking in about 30 minutes, which is definitely a winner. I won't be making posole tomorrow, but with these cold temps, you can bet it will be on the menu sometime soon.
Chicken Posole
Ingredients
1 lb. skinless, boneless chicken breasts, diced
1 t dried thyme
Salt and pepper
2 T olive oil
1 large onion
1 jalapeno pepper, chopped (remove seeds and veins)
2 cloves minced garlic
3 small cans diced green chiles (or to taste)
4 c chicken broth
2 15 oz. cans hominy, drained
Optional garnishes: Cubed or sliced avocado, chopped radishes, chopped cilantro, salsa, lime wedges, shredded cabbage or lettuce, tortilla chips
Directions
1. Toss the diced chicken with 1/2 t thyme and some salt and pepper. Set aside.
2. Heat the oil in a large saucepan over medium heat. Add the onion, jalapeno and garlic and cook until soft, about 3-4 minutes. Add chiles and the remaining thyme. Cook over medium heat for about 5 minutes.
3. Add the broth, hominy and chicken to the saucepan. Cover and simmer until the chicken is tender, about 10 minutes. Garnish to your heart's content.
And remember what your abuelita always says: "Eat your posole while it's hot!"
Thursday, November 29, 2012
High Altitude Baking-Pie in the Sky by Susan G. Purdy
The first chocolate chip cookies I baked here at the ranch were a dismal failure: flat, spread out, and strangely bland tasting. We live at an altitude of over 7000 ft. and I knew there were ways to change ingredients and baking times to ensure cookie success, but it was hit and miss, mostly miss.
Baking brownies was inconsistent, too, with some pans coming out perfectly and the next time a gooey mess. I used high altitude techniques, but they didn't always work.
Enter the book Pie in the Sky by Susan Purdy, a book prized by several of my quilty buddies who live up here, too.
I stumbled upon the recipes while searching the internet for an apple cake I could bake at a high altitude. I found this blog post, tried the recipe, and it worked! The cake was flavorful, had risen properly and wasn't gummy or gooey in the middle. But, and here's a big ol' but, I had used whole wheat pastry flour instead of regular white flour, so the consistency was kind of like sawdust. It wasn't the recipe's fault, just the goofball who decided to substitute a key ingredient.
So I bought the book and have tried a couple recipes so far: the Aspen Apple Cake which had been grainy made with my whole wheat substitution was moist and cake-like when the proper flour was used.
For Thanksgiving MBB made the 1-2-3-4 Cake, a white cake to which she added walnuts and chocolate frosting, and it was a hit.
Author Susan Purdy researched and experimented at various elevations while developing these recipes. I always thought high altitude baking was the same at 3000 feet as it is at 7000 feet. Nope. Purdy has recipes and directions for sea level, 3,000, 5,000, 7,000, and even 10,000 feet (ah....our Mogollon Baldy lookout job would have been muy different if this book had been there). There are tweaks of ingredients, temperatures, pan prep, equipment, even where the oven rack goes, specific to how high you are (that was a little big of a joke....sorry). Nothing has been left to chance.
In addition to cakes, there are recipes for cookies, pies, breads, souffles, quick breads and muffins: anything I might need to bake with no guesswork involved. My only quibble is about the food photos. There are not enough of them, just a few in the center of the book. In case you wondered, I was not paid to write this review. I just liked the book.
Hmmm....this cake looks pretty good.
Wednesday, October 24, 2012
Freezer Apple Pie Filling
![]() |
My applepeelercorer in action. |
Why?
Well, after I made the pie filling but hadn't yet canned it, I read in several places that cornstarch is not recommended for canning. The heat doesn't conduct well enough through the cornstarch to make the mixture hot enough during the canning process, rendering it not safe. A product called Clear Jel was recommended for thickening the apple mixture instead of cornstarch.
So I froze the pie filling instead of canning it, a quart of filling in each of four gallon sized freezer bags. Then I jumped into making other apple products. I worried about the cornstarch in the frozen apple pie filling. Maybe I shouldn't share the recipe, I wondered. I wouldn't want to poison anyone. So I practiced the art of avoidance and didn't write about apple pie filling.
Then I felt guilty because a promise is a promise. I said there would be an apple pie filling recipe, even though I posted this one, a danged good one, a couple years ago.
After a little internet research, I found the exact same recipe (including cornstarch) on another site, but they called it Freezer Apple Pie Filling and none of the comments had an issue with cornstarch. The cornstarch issue must be for those who can. Who can can. Okay, enough.
So now I feel better. Here's the recipe. As I was making this pie filling, I did a little tasting and this would not only be good for pies, but for topping a cheesecake, added to oatmeal, or to plain Greek yogurt, well, you get the idea that this stuff is totally awesome, dudes and dudettes!
Freezer Apple Pie Filling
Ingredients:
16 cups apples, peeled, cored, and thinly sliced (that's my peeler slicer corer in the photo)
4 T lemon juice
3-4 cups white sugar, depending on the tartness of your apples
1 cup cornstarch
4 t ground cinnamon
1 t ground nutmeg
1 t salt
8 cups water
Directions:
1. Toss the apples with lemon juice in a large bowl
2. Combine the sugar, cornstarch, spices and salt in a medium bowl.
3. Pour water into a large stock pot or Dutch oven over medium heat.
4. Whisk the sugar mixture into the water in the pot and bring to a boil. Boil for two minutes, stirring constantly.
5. Add the apples and return to a boil. Reduce heat and cover the pan. Let the apples cook for 6-8 minutes, until they are tender but still hold their shape. Watch out or you may end up with applesauce if you cook it too long.
6. Cool for 30 minutes.
7. Ladle the pie filling into 4 quart sized freezer containers with 1/2 inch headspace or into 1 gallon sized Ziplock bags. If you are using bags, try to remove excess air before sealing. Cool at room temperature for no more than 1 1/2 hours.
8. Freeze. Or make a pie right now.
Pie filling can be stored for up to 12 months.
Monday, October 15, 2012
Canning Chaos-Slow Cooker Apple Butter
It is wonderful to have a bumper crop of apples. I just had to add that link because how the heck did bumpers get into the crop business? Now I know and so do you.
I have been busily slicing apples, making them into apple pie filling, apple butter, jarred apples and dried slices.
Trudy's gave us this amazing peelercorerslicer, which she had when they lived in Apple Valley, CA. When they left their apple trees, she passed it on and it's been getting a workout.
This contraption has made peeling almost 100 apples a breeze! And no, I didn't peel them all at once. That's for hard core canners. I am a lightweight, believe me.
People around here don't waste a thing, so canning, freezing and drying are part of life, just like it is in other agricultural parts of the United States and in some hipster enclaves in Brooklyn. Just kidding: I know there are folks everywhere who have decided they want to know where their food comes from and have been preserving their hearts out. And that's a good trend, don't you think?
Here at The Nickel and Dime, the little kitchen has been in chaos for a week, but the end is in sight and I dream of quality time in the sewing room during the chill months ahead.
I figure I will make another batch of apple butter. I used the Crock Pot so it was easy. All I did was layer apples and a sugar and spice mixture up to the brim of the cooker, plop on the lid and cook it for about 12 hours. I didn't stir it until the 12 hours were up. Then I removed the top, turned it to high and let it cook down for a couple more hours.
Here's the recipe:
Slow Cooker Apple Butter
5.5 lbs apples, peeled and finely chopped
3 cups sugar
2-3 teaspoons cinnamon
1/4 teaspoon ground nutmeg
1/4 teaspoon ground cloves
1/4 teaspoon salt
Layer apples, sugar and spices (mixed together) in a Crock Pot to the brim. Cover the pot and cook on high for 1 hour. Then turn to low and cook on low for 9-12 hours until thickened and dark brown. I didn't stir mine, but newer slow cookers seem to cook hotter on low, so you might want to give yours a stir or two if you have a new one.
Enjoy how fragrant your house becomes while this is cooking.
After it looks brown and thickened, remove the lid, turn up to high for 1-2 hours. You can determine if it's thick enough by dabbing some apple butter on a saucer. If it holds its shape and isn't watery, you're done!
Now you can use a whisk or an immersion blender to smooth out your apple butter if you want.
Spoon into freezer containers, leaving 1/2 inch space at the top and pop into the freezer. You can also process this in jars in a water bath canner.
Makes about 6 half pint jars of apple butter
Next recipe is for the apple pie filling, really!
While Ms. Pearl is happy to pose with a basket of red delicious apples, she wants you to know that she likes tomatoes but not apples.
Labels:
Apple Butter,
apples,
canning,
fall,
Ms. Pearl,
preserving,
recipes
Monday, October 1, 2012
Apple Chips
Yesterday I took out the apple corer-peeler that Trudy gave us long ago and used it to cut up some Red Delicious apples. The apples this years are amazing, but we have decided the Red Delicious are actually the least delicious of our three trees.
That said, I decided to dry these guys and now I can say that they really are delicious! The mildness that is a Red Delicious has been concentrated during the drying process making them a worthwhile snack.
I have a dehydrator but was too lazy to dig it out, so I tried drying apples in the oven. It was easy and in two and a half hours at 250 degrees, they were done!
This is the recipe I used from Serious Eats. There was a short dip in some sugar syrup before I placed them on parchment lined cookie sheets. Halfway through I flipped the slices over. At the two hour mark I checked them again and they weren't dry enough so they got another half hour. It has been raining here, so I figure there was humidity in the air.
Four dried apples filled a quart sized plastic storage bag halfway. That doesn't look like much, but when I did a taste test, I realized that about three of these slices was plenty for a little pick me up snackaroo.
I'm doing more today, and I will take out the dehydrator to work alongside the oven. We have a crapload of apples on these trees and I don't want to waste them.
Next: Apple Pie Filling
Labels:
apples,
dried apples,
recipes,
snacks
Sunday, September 9, 2012
Blue Corn Raspberry Coffee Cake
Up here in Northern New Mexico it's raspberry season and a couple weeks ago M and I went raspberry picking at Salman Ranch. It was fun and we ended up with enough raspberries to snack on, freeze, and bake into coffee cake and muffins.
It's hard to bake at an altitude this high, especially if I want to put stuff in the batter. Stuff in the batter, I have learned from my friend Betsy the high altitude baking expert, causes the batter not to rise correctly. Betsy worked in the high altitude test kitchen of General Foods several years ago, so she knows what's up.
Nonetheless, I decided to bake a not too sweet cake with raspberries and blue cornmeal. And what the heck, I tossed in some toasted pinon nuts, too.
And you know what? The cake came out fine with no high altitude changes at all.
Raspberry Blue Corn Coffee Cake
Just a note: This is not a very sweet cake. Most of the sweetness comes from the raspberries.
Makes 1 single layer cake, 8 inch square or round pan
Ingredients
1/2 cup piñon nuts
1 cup unbleached white flour
1 cup stone-ground blue cornmeal
1/2 tsp. salt
1 Tbs. baking powder
1 1/4 cups buttermilk
1/2 tsp. baking soda
2 large eggs, or reconstituted egg substitute to equal 2 eggs
1/2 cup granulated sugar
1/3 cup mild vegetable oil such as corn, canola or peanut
1 cup fresh raspberries
Extra sugar for sprinkling on top
Directions
- Preheat oven to 400F. Spray a 8 or 9 inch round or square baking pan with nonstick cooking spray.
- Toast piñon nuts by heating in a skillet over medium heat, stirring or shaking pan almost constantly, for 3 to 4 minutes. When nuts become aromatic and golden, remove from heat and set aside.
- Combine flour, cornmeal, salt and baking powder in a large bowl, stirring well. Set aside. In a medium bowl, whisk together buttermilk and baking soda. Whisk in eggs, sugar and oil.
- Stir combined wet ingredients into dry until mixture is not quite blended. Be gentle when blending. Add piñon nuts and raspberries with a couple of strokes so the mixture is just barely combined. Pour into prepared baking pan. Sprinkle the top with some sugar, about a tablespoon or so.
- Bake for 15 to 20 minutes, or until edges are golden brown.
Wednesday, September 5, 2012
Tomatoes, Flowers, Apples and a Recipe
Yesterday I took a mosey around to see how stuff was growing. This summer had a pretty good monsoon season and the plants have been extremely grateful. I am grateful for the former lady of the house who, although only here on vacations, thoughtfully planned out the garden so that there is always something blooming during the growing season.
But I don't know what all these plants are, so if you can identify anything, please leave me a comment, okay?
Here's a closeup of one of the flowers:
Because we have no beef cattle around this summer, they didn't eat this vine and I discovered that it actually blooms!
Let me know if you know what this one is.
I admired the apples. I never had an apple tree before, so this is a treat.
I checked out the bee hives. Bears are out and about and the white fence is electrified. Yogi and Boo-Boo do not get this honey!
Inside the Growing Dome I said hello to Manny, Moe and Jack, the resident Wal-Mart goldfish who live in the large water tank.
This is The Tomato Thicket. It's a wall of tomatoes and I have to hunt around to find all the ripe ones.
The Roma tomatoes are sneaky and hide deep within the thicket. But I found them because I am a relentless seeker of errant tomatoes.
And I made this excellent tomato sauce from Smitten Kitchen.
http://smittenkitchen.com/blog/2011/08/naked-tomato-sauce/
Then I went to Thread Bear, the local Las Vegas, NM quilt store, to buy fabric for a class I am taking in Albuquerque this weekend taught by Jacquie Gering, one of my quilt heroes.
Labels:
flowers,
Growing Dome,
Jacquie Gering,
quilting,
recipes,
summer,
tomatoes,
yard
Saturday, July 28, 2012
Grilled Cheese, Roasted Pepper, Tomato and Pesto Sandwich
I like to cook, but there are days when I don't want to deal with making an entire meal because a) it's too hot to cook b) I've been busy and just want to chill and/or c) we've eaten something giant and delicious for breakfast or lunch, like a burrito from our local restaurant, The Mad Cow Calf-A, and we just don't need to eat another big meal.
That's when it's perfectly okay to assemble dinner, use one pan and that's it. Grilled cheese is one of those perfect quickie meals, and this one is not only cheesy, but juicy and savory as well. I used some shredded cheese I found in the fridge, but slices are just fine. Add some flavor punch with some purchased pesto and moistness with some jarred, roasted red peppers and a homegrown or farmers' market tomato. I used a yellow Jubilee tomato for this sandwich.
Butter or olive oil the outside of the sandwich, so when you grill it, the bread is lightly browned.
If you feel the fam needs veggies, make this salad in the morning (pictured below) so all you have to do is set it on the table along with the grilled cheese sandwiches.
Grilled Cheese, Roasted Red Pepper, Tomato and Pesto Sandwiches
Ingredients (makes 1 sandwich)
2 slices bread
1 T prepared pesto
1 or 2 tomato slices
1 oz. cheese, your choice, sliced or shredded
2 or 3 pieces jarred roasted red peppers
butter, margarine, or olive oil
Directions
1. Heat a grill pan, griddle, or skillet over medium-low heat
2. Butter or brush some olive oil on one side of the bread slices.These will be the outside of the sandwich.
3. Assemble sandwich: pesto on the bread, then cheese, tomato, and peppers.
4. I like to add a little cheese on both sides of the juicy ingredients so when I grill the sandwich, it all sticks together.
5. Carefully place the sandwich on the hot griddle. If you want to make it panini-style, place a piece of aluminum foil on top of the sandwich and then put an iron skillet on the foil to smash it all down. Let the bottom of the sandwich grill. Check that it isn't burning and that the cheese is melting.
6. Flip the sandwich over, replace the foil and the iron skillet if you are making a panino, and keep an eye on it.
7. Once the cheese is melted and the bread is brown, you are finished! Enjoy!
Friday, July 6, 2012
Quinoa Mixed Veggie Salad
Maybe I can blame it on having overnight guests followed by the 4th of July holiday, or maybe it was the above average temperatures. But sitting on the porch and having a snack and a drink every afternoon while dinner was cooking combined with several ice cream-eating-movie-watching evenings has made me feel a tad sluggish.
So I am putting away the sugars, beer and refined stuff for a while to get back to my energetic (hah!) self. People always say I gogogo, but really I am a slug dressed as an Olympic runner.
In the pantry was a package of quinoa, (pronounced KEEN-wah) I bought during a Santa Fe Trader Joe's expedition. Quinoa looks like a grain, but it's not really part of the cereal grain family, but more related to spinach and beets. It's full of flavanoids, antioxidants, hearth healthy fats, and I don't feel hungry right after eating it like with regular pasta or rice. Quinoa is easier to cook than rice and it's okay to make a lot of it and store it in the fridge for later.
I like this recipe because you can switch out the veggies depending on what's in your crisper or garden and if you want to add a little leftover cooked chicken, that's okay, too.
After eating this tasty, chewy and crunchy quinoa salad, I felt healthier almost immediately, ready to put on a mask and cape and fight some crime. Unfortunately, the only crime around here recently involved a fist fighting sheriff who lets drunk drivers go. But that's another story.
Quinoa Veggie Salad
Ingredients:
1 cup quinoa
1 1/2 to 2 cups water, vegetable, or chicken broth (read your package label to determine how much liquid to use)
1/4 t salt (omit if you are using broth)
1 cup green beans, sugar snap peas, snow peas, or thinly sliced celery
2 small carrots, peeled and sliced thin
1/2 red or green pepper, sliced thin
1 fresh, ripe tomato or substitute 1/2 cup mild chunky salsa for a little more zip
1 medium cucumber, peeled, seeded (if you wish) and diced
1/2 cup chopped, toasted nuts (I used walnuts)
Dressing:
2 T lemon juice
2 T olive oil
salt and fresh ground pepper to taste
1/2 t minced garlic (optional)
Directions:
1. Cook your quinoa as the package directs, using broth or water. I used chicken broth. You can do this ahead of time if you want.
2. Boil or steam the carrots and green beans 5 minutes until they are crisp tender. Drain and rinse with cold water until they aren't hot anymore.
3. Chop the tomatoes, peppers, and cucumbers.
4. Blend the dressing ingredients in a small dish or shake it up in a jar. Shake it like a Polaroid picture.
5. In a large bowl combine the quinoa, veggie ingredients, nuts and dressing. Taste and add salt and pepper if it needs it.
6. Cover and chill or serve immediately.
Serves 4 and lasts for several days in the fridge.
Tuesday, July 3, 2012
Strawberry Icebox Cake
The 4th of July is almost here and that means barbecues and food, most definitely. Do you need to take a dessert?
I shared this recipe last year, a simple dessert where you don't have to turn on the oven! For you folks suffering in the heat, I can't give you a better 4th of July gift. Give this icebox cake about 4 hours in the fridge to allow the whipped cream and strawberries to soak into the graham crackers, making an excellent, creamycakeyfruity treat. There's also the satisfaction of returning home with an empty pan, but that satisfaction is bittersweet because you know you want one more bite.
Strawberry Icebox Cake
Ingredients
2 pounds of fresh strawberries
3 cups heavy whipping cream
1/3 cup confectioners sugar
1 t vanilla
4 sleeves graham crackers (that's about 24 whole crackers)
Hershey's chocolate syrup, dark (optional)
Directions
1. Take out 4 or 5 good looking strawberries and set aside. Thinly slice the remaining strawberries.
2. Whip the whipping cream until it just starts to hold stiff peaks.(Stop the mixer, lift up the beater and if the cream peaks, that's what we're talking about here.) Add the sugar and vanilla and whip to combine. Don't overwhip or you will have butter.
3. Spread some whipped cream on the bottom of a 9 X 13 inch baking pan. Place six graham crackers on top of the whipped cream. Lightly layer another spoonful or two of whipped cream. Add a single layer of strawberries. Repeat the graham cracker layer, whipped cream layer, and strawberry layer three more times until you have four layers of graham crackers.
4. Spread the remaining whipped cream over the top and drizzle a zigzag of chocolate syrup over the whipped cream if you want to.
5. Cover the pan with some plastic wrap and place in the fridge for at least 4 hours. The graham crackers should have softened completely. They are supposed to be "cake-like."
Before serving, put the pretty strawberries you saved on top. This icebox cake is so yummy you should encourage everyone to eat it all because if there are leftovers in the fridge, you will find yourself spooning this strawberry goodness out of the pan in the middle of the night.
Serves 8
Friday, June 1, 2012
Trudy's Coleslaw
If you don't like coleslaw, then we have something in common. The coleslaw I remember as a child was swimming in watery mayonnaise, the cabbage limp. And let's not blame my mom; she never made coleslaw.
Instead, this icky slaw (isn't slaw a gross-sounding word?) was a side dish served when my mom and I had lunch at a local restaurant or scooped from a cardboard cup included with takeout Kentucky Fried Chicken. There was an odd tang to the dressing and it tasted old. And amazingly, I think my parents must have agreed with me, because they didn't make me eat it, except for one Girl Scout bite once in a blue moon.
When I was fifteen and a half, working my first job as a short order cook at Waltze's Drive-In, I learned why the dressing tasted weird: it came from giant plastic jars, the dressing made years before it was finally mixed with the cabbage.
The first time I had my mom-in-law's coleslaw I was transported. Trudy's coleslaw was fresh tasting and crunchy, with not just cabbage, but chopped bell peppers, carrots, onion, celery, whatever she felt like adding that day. The dressing reminded me of my mom's beloved potato salad and I became a lover of coleslaw, at least Trudy's.
A few years later I received a treasured present: family recipes with stories about each dish, painstakingly transferred to 3 by 5 inch cards in Trude's handwriting. The coleslaw recipe was there. The recipe is not always the same, but evolves depending on what's in the fridge or the pantry.
Trudy's Coleslaw
Ingredients
1. In a large bowl, mix together the dressing ingredients.
2. Add the cabbage and other veggies to the bowl. If your hands are clean and no one is looking, use them to mix the dressing and the shredded veggies. (Don't feel weird doing this because lately I've noticed chefs using this technique to mix salads.)
3. Garnish with some sliced green onions, if you wish.
Instead, this icky slaw (isn't slaw a gross-sounding word?) was a side dish served when my mom and I had lunch at a local restaurant or scooped from a cardboard cup included with takeout Kentucky Fried Chicken. There was an odd tang to the dressing and it tasted old. And amazingly, I think my parents must have agreed with me, because they didn't make me eat it, except for one Girl Scout bite once in a blue moon.
When I was fifteen and a half, working my first job as a short order cook at Waltze's Drive-In, I learned why the dressing tasted weird: it came from giant plastic jars, the dressing made years before it was finally mixed with the cabbage.
The first time I had my mom-in-law's coleslaw I was transported. Trudy's coleslaw was fresh tasting and crunchy, with not just cabbage, but chopped bell peppers, carrots, onion, celery, whatever she felt like adding that day. The dressing reminded me of my mom's beloved potato salad and I became a lover of coleslaw, at least Trudy's.
A few years later I received a treasured present: family recipes with stories about each dish, painstakingly transferred to 3 by 5 inch cards in Trude's handwriting. The coleslaw recipe was there. The recipe is not always the same, but evolves depending on what's in the fridge or the pantry.
Trudy's Coleslaw
Ingredients
- 1 cup mayonnaise (up to half of this can be yogurt or sour cream)
- 1-2 tablespoons sugar (start with 1 tablespoon and then taste. Add more if you want)
- 2 tablespoons cider vinegar
- 1/4 teaspoon dijon mustard
- 1 teaspoons black pepper
- 1/2 teaspoon salt
- 1/8 teaspoon celery seed
- (you may substitute 3/4 teaspoon of Old Bay seasoning for the salt and celery seed)
- 1-2 tablespoons milk if your dressing seems a little thick
- 4 cups shredded or finely chopped green cabbage (mix in a little red cabbage for color if you want)
- 1 cup shredded or finely chopped mixed veggies (carrot, onion, bell pepper, celery, etc.)
- Optional garnish: sliced green onion tops
1. In a large bowl, mix together the dressing ingredients.
2. Add the cabbage and other veggies to the bowl. If your hands are clean and no one is looking, use them to mix the dressing and the shredded veggies. (Don't feel weird doing this because lately I've noticed chefs using this technique to mix salads.)
3. Garnish with some sliced green onions, if you wish.
Sunday, May 20, 2012
Chard is Actually Good! A Simple Chard Recipe
In the 1960's when I was growing up, most veggies at our house came from a can. Peas and green beans were a grayish green and spinach looked like elephant snot (at least that's what I told my mom when she served it.) I loved canned carrots. Go figure.

Both our parents worked, so there was no veggie garden in the back yard and the only farmers' market nearby was the Japanese market on the way to the beach where we would buy strawberries in the spring and corn during summer. And, of course, we had those country green beans that were cooked all day. Yum! But chard? What was that?
I didn't know anything about chard until a few years ago and I didn't eat it until last week. What can I say? I was a deprived child! I don't have chard in my garden yet, but when it's time to plant cool weather veggies in the Growing Dome, you can bet I will. Kale is growing in the dome right now, but kale is for another post.
Anyway, the rainbow chard at the healthy foods market in Taos was so pretty I bought some. MBB eats that stuff all the time and I hate when my kid is one up on me, and it is well known that chard is a nutritional powerhouse full of antioxidants and vitamins, so sign me up.
4. Once you've added the garlic, cook for a minute or two more and then add the balsamic vinegar. Toss it around so the chard is coated with the vinegar. (Don't cook too long or the chard will look like elephant snot.) Add some salt and pepper to taste.
And that's it!
Optional: Toast a couple tablespoons of pine nuts and sprinkle them on top.
I can't believe how much I liked chard after eating this! What in the world was I waiting for?

Both our parents worked, so there was no veggie garden in the back yard and the only farmers' market nearby was the Japanese market on the way to the beach where we would buy strawberries in the spring and corn during summer. And, of course, we had those country green beans that were cooked all day. Yum! But chard? What was that?
I didn't know anything about chard until a few years ago and I didn't eat it until last week. What can I say? I was a deprived child! I don't have chard in my garden yet, but when it's time to plant cool weather veggies in the Growing Dome, you can bet I will. Kale is growing in the dome right now, but kale is for another post.
Anyway, the rainbow chard at the healthy foods market in Taos was so pretty I bought some. MBB eats that stuff all the time and I hate when my kid is one up on me, and it is well known that chard is a nutritional powerhouse full of antioxidants and vitamins, so sign me up.
Plus, isn't this chard pretty?
It reminds me of spinach, so after reading around a bit and also remembering how my dad made our canned spinach palatable by adding a few drops of vinegar, I came up with this recipe.
Sauteed Chard With Garlic and Balsamic Vinegar
Ingredients
2 T olive oil
2 cloves of minced garlic
1 washed bunch of chard, leaves stripped from the stalks, cut into wide strips (I chopped the stalks to use for soup)
2 T balsamic vinegar
salt and pepper to taste
Directions
1. Heat a large skillet over medium heat, add the olive oil.
2. When the olive oil is shimmery, add the chard.
3. Using tongs to turn the chard in the pan, cook for about five minutes until the chard is almost wilted. Add the chopped garlic to the pan.
Below is the garlic in my favorite chopper, the Garlic Zoom. The photo after that shows the chard and garlic hanging out.
4. Once you've added the garlic, cook for a minute or two more and then add the balsamic vinegar. Toss it around so the chard is coated with the vinegar. (Don't cook too long or the chard will look like elephant snot.) Add some salt and pepper to taste.
And that's it!
Optional: Toast a couple tablespoons of pine nuts and sprinkle them on top.
I can't believe how much I liked chard after eating this! What in the world was I waiting for?
Subscribe to:
Posts (Atom)