Search This Blog

Showing posts with label green chiles. Show all posts

Sunday, April 12, 2015

It's National Grilled Cheese Day! (But Green Chile Cheeseburgers Need Love, Too.)

Wow! I didn't even know until this morning, or I would have cooked up a "grilch" --what we call a grilled cheese sandwich--for breakfast.

So here's a "greatest hits" post today about two of my favorite grilled cheese sandwiches.

This first one is a grilled cheese, roasted pepper, tomato and pesto sandwich. That's a big yellow tomato slice on there, from my garden, a couple years ago. Man, that looks yum!


Here's the recipe link.

And here's a link for my other favorite blog post: Grilled Cheese and Green Chile.

Still, who says you need to have a Grilled Cheese? You might want a green chile cheeseburger at Santa Fe Bite restaurant. It is the best I've eaten and you won't have to eat for the rest of the day!
    A cheeseburger on a plate with green chile sauce.
    Photo courtesy of Santa Fe Bite


Monday, October 13, 2014

Growing Dome- Fall 2014

It really is fall here, now, with the pretty aspen trees and last night's below freezing temperatures. In SoCal, there really aren't distinct seasons, but just hot and not so hot. Back in California, when it dipped into the 50's, I'd get out my long underwear and think I was really cold.


 But I didn't really know what cold was until I moved to Northern New Mexico. Heck, there's a small community around here whose nickname is Little Alaska, for heaven's sake!

But I am willing to put on my coat and longies for winter because it's a fine trade for wonderful, temperate summers. Months of over 100 degrees is not my thing, so I find the lightest weight, high performance warmies to wear during wintertime and deal with it.

One way I cope with colder weather is with my Growing Dome, where I have a chance to garden and to bask in the winter sun. Over 300 days of sunshine definitely hits the spot.

During winter I grow cool season crops like chard, kale, lettuce, and all that.


 During summer, I grow most of my tomatoes and all of my cucumbers inside the dome. Some friends grow tomatoes outdoors, but I seem to have bad luck with outdoor tomato plants. They give me a few and then it freezes. I know I could mess around with walls of water and little hoop houses, so maybe that's on the agenda for next year.

Right now my outdoor tomatoes are toast, but inside things are still perking along.


It's like a jungle sometimes/ Sometimes I wonder how I keep from going under (Sorry-Grandmaster Flash took over for a sec.)

In here it's usually about 20 degrees warmer. Temp outside was 29F last night, but all is well inside the dome.


Here's a pretty yellow tomato. I had some red ones, but a varmint climbed inside and chewed them down. We added some wire mesh to the side air vents, so maybe that will keep the little @#$@ out.


We still have plenty of green tomatoes, so if our days are in the 50's to 60's for a while longer,  they will ripen.


We have a load of cucumbers on the vines. Earlier in the summer there were juicy, tasty green straight eight's. Then a couple weeks ago the cucumbers started looking like this. I waited for them to turn green but they never did. They taste fine except for a little bitterness at the stem end (my fault for not being a consistent waterer). Earlier I replanted some varmint-ravaged plants, and maybe they were Poona Kheera seeds? It's a mystery.


Each time I visit the dome there is something to pick, which is totally cool. Earlier I had a bumper crop of Shishito peppers, but the aphids made them anemic, so I had to pull the plants. Those peppers were the best, though, just sauteed with a little salt and lime. Yum!


My fishies are doing well. Last year I was mystified to see strange little fish in the dome's water tank, then realized my original three goldfish had a menage a trois which resulted in fourteen goldfish babies! 

Not Koi, but plain old Wal-Mart goldfish, they recognize me when I lean over to visit, happy to eat their fish food pellets.  During winter they hunker down at the bottom of the tank and wait for spring.

So come on, winter! I'm ready for you. 

Well, kind of.


Tuesday, September 30, 2014

Wood and Green Chile Are In

A couple weeks ago I was at our local Mora Farmer's Market and the weather was unseasonably cool, in the 50's. Everyone was bundled up and there wasn't a pair of shorts in sight. Peggy, one of the farmers, said, "It's a reminder to get your wood in!"

We've been working on that.


Almost everybody uses wood heat around here. This is a common sight, although there's usually a dog of some sort riding on top of that load.


In town, the cool breezes carry the sharpspicysmoky scent of roasting chiles. The folks who tend these baskets with their fiery heat will roast the chiles you choose in nothing flat. You can find them on street corners, in front of grocery stores, and at the fancy mall in Albuquerque. The smell of roasting chiles is a reminder to get your chiles in. So okay, that's what I will do.


People line up for their favorite roasters selling their preferred chiles: Socorro, Hatch, Rocky Ford are all represented around here. I've been buying Socorro chiles from a crack team of roasters led by a man in a wheelchair.

When the chiles are done, they are shoveled into a heavy duty plastic bag (I suppose there is BPA there but I will pretend not). Inside, it looks like an inferno happened. At first I was kind of, "Ewww!' but they smell so good.


I split 40 pounds with a friend, so we each left the chile roaster with 20 pounds of chiles. At home I removed chiles from their black bag a handful at a time and packaged them in smaller plastic storage bags.


This year I listened to friends who said, "Don't peel or seed them, just put the chiles in the bags and do all that when they're defrosted." So I defer to experience, and it was a lot faster and easier this time around.

What will I make with all this green chile?

Here are a few links to my favorite green chile recipes:

Pie Town's Famous Green Chile Apple Pie

Grilled Cheese and Green Chile Sandwich

Green Chile Mac and Cheese


While I was at the post office today I noticed the aspens up higher in the mountains are turning yellow, another reminder that autumn is here. I didn't take this photo, but if you are near Taos, you are in for a big show.


Happy Autumn!

Sunday, April 22, 2012

Chicos and Pork Stew

When Paula, who worked for the same educational organization I did in California, learned I was moving to Northern New Mexico, she said, "Ohhhhhh, I miss chicos! My grandma used to make them for me when we went to Ocate to visit!"

So after we arrived, I started looking for chicos.

"I think the guy at the gas station at midway sells them," our friend Ernest said, but the man inside the gas station, midway  between Las Vegas and Mora (get it?) said, "We don't have any more." Someone suggested a roadside vendor, but he was sold out, too. I looked everywhere in Mora and San Miguel counties, but couldn't find any chicos.


I finally found chicos at a farm market in Albuquerque. There they were, packaged in a plastic bag, looking just like wrinkly popcorn or maybe a bag of baby teeth.   

Farmers have been processing chicos the same way for hundreds of years. I guess you could call this a heritage food. Chicos are made by steaming whole ears of corn in the husk and then hanging them to dry. After the cobs have dried, the corn kernels are removed by hand. We're talking serious labor hours when it comes to chicos. If you want to watch how one family makes their chicos, here is a link to a video made by a student in Chamisal, NM, about 50 miles east of where we live.

Unlike hominy, which has had the outside of each kernel and the germ removed using lye, chicos is a whole grain with everything intact. When they are cooking,  a savory popcorny aroma drifts from the pot and throughout the house.

If you don't live in New Mexico but want to give chicos a try, here is a link to one of my favorite websites, Local Harvest.  Here not only can you find New Mexico foods, but food suppliers and farmers in your own backyard.

Don't forget to soak your chicos overnight before cooking since they are a dried grain and need some time to reconstitute. Because they have a long simmer, I just might use my slow cooker next time.


Chicos and Pork Stew (adapted from a recipe by Michele Ostrove  in New Mexico magazine)

Ingredients

2 cups chicos
4 cups chicken broth
1/2 pound pork loin from either chops or a roast, cut into half inch cubes
salt and pepper to taste
2 T chile powder (ancho or chipotle or a mix of the two)
a teensy dash of cinnamon (optional)
2-4 T cooking oil
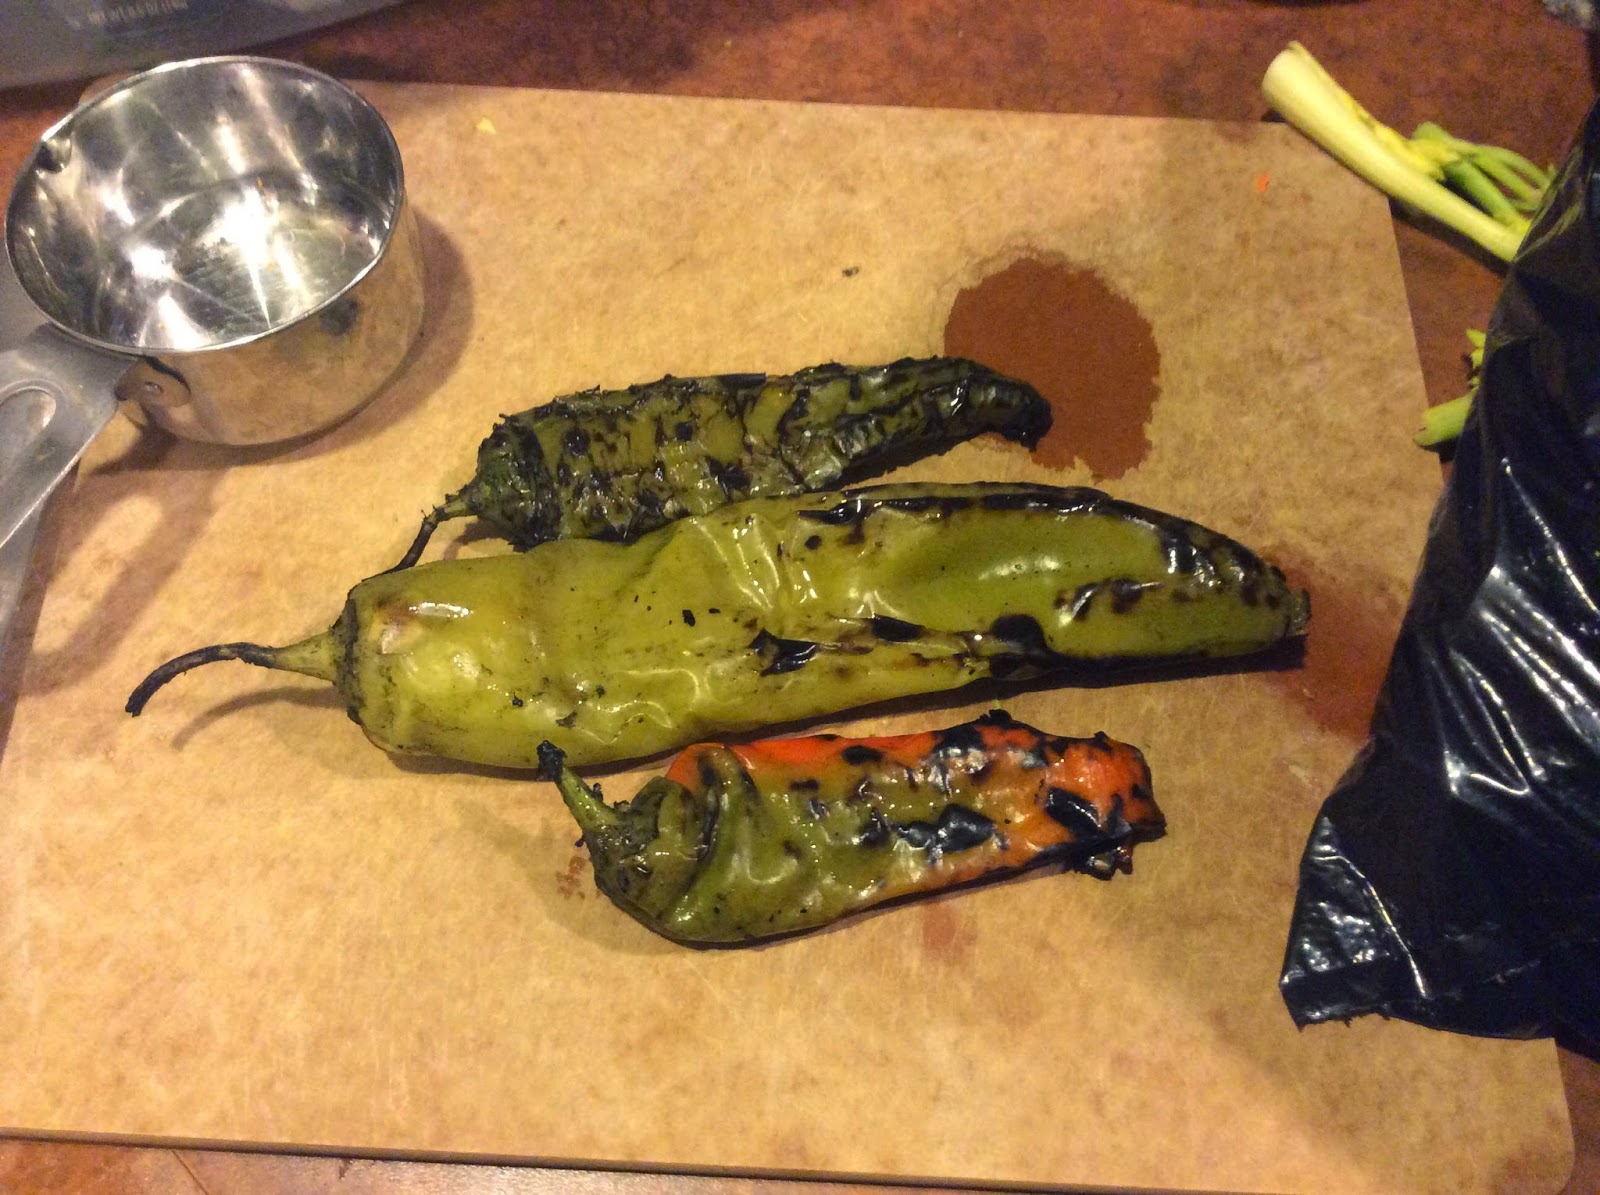
2 roasted green chiles (Anaheim, poblano, or Big Jim), peeled, seeded and diced or 1- 4 oz can chopped green chiles
1 large onion, chopped
salsa (The chunky salsa in the photo is Antonios, made in Taos)
sour cream (optional, but nice if your food is a little spicy)

Directions

1. Soak your chicos in water overnight until they have about doubled in size)
2. Rinse chicos, place in a 4 quart pot with the chicken broth. Bring to a boil and simmer for about 5 hours. Keep an eye on them and add additional broth if needed.
3. Give your chicos a taste test: They will be firm but chewable.
4. Meanwhile, toss the cubed pork loin with the chile powder, salt and pepper.
5. In a hot skillet, add 2 T oil. When the oil is hot, add the cubed pork and saute until browned but not totally done.
6. Add the pork to the pot of chicos.
7. In the same skillet that has those lovely remaining pork bits and crunchies, add oil, if needed, and then the onion and green chiles. Cook until the onion is translucent. Then add this mixture to the pot of chicos and pork.
8. Simmer for about 1 hour and check seasonings.

Serve with a side of tortillas; top with salsa and sour cream. Yum.

Friday, November 25, 2011

Stacked Turkey Enchiladas, Green

Yesterday was awesome, but I was too busy to take a photo of the Thanksgiving table groaning with food. This photo will have to suffice, I guess.

If you're like I am, you will mine that leftover turkey carcass for all it's worth, and in this case, since we opted for a local Embudo Farms turkey, it was worth a lot!

That turkey still has some miles on  it, to the tune of Turkey Tortilla Soup and Turkey Stacked Enchiladas, as well as the basic reheated turkey, potatoes, gravy, etc plate you are having for breakfast.

New Mexican cooks (West Texans, too) stack their enchiladas rather than roll them. It's quicker and easier to layer the tortillas and if you are suffering from post Thanksgiving Cooking Syndrome like I am, it's minimal effort for something delicious. Some folks stack individual portions on a plate, but I am a casserole fan, so that's how this one will go.

Stacked Turkey Enchiladas, Green 

Preheat oven to 375 degrees. Have 9 X 9 inch oven safe dish handy.

Ingredients

12 corn tortillas
1 28 oz can green chile enchilada sauce, mild (I like Juanita's or Las Palmas)
2 cups shredded turkey
3/4 c sour cream
6-8 ounces of shredded Monterey Jack cheese

Salsa, more sour cream, cilantro for garnish. 

Directions

1. Pour almost all the green chile sauce into a saute pan. Save about 1/2 cup  to cover the bottom of your baking dish.

2. Heat the green chile sauce to barely simmering. Dip your corn tortillas, using tongs, one at a time, into the sauce to soften a little. (You can do this with oil, but after that giant Thanksgiving dinner do you really need more fat?) Arrange 4 tortillas over the sauced bottom of your baking dish, overlapping slightly and allowing the tortilla to climb up the sides of the dish if necessary.

3.  Sprinkle 1 cup turkey over the first layer of tortillas.  Using a spoon or ladle, pour a little of the simmering green chile sauce to moisten. Sprinkle a third of the cheese over the turkey and dot 1/4 cup sour cream over it all.

3. Dip 4 more tortillas into the simmering green chile sauce, arrange like before and repeat with remaining 1 cup turkey,  one third of  the cheese, chile sauce to moisten,  and sour cream dollops.

4. Dip the last 4 tortillas in the remaining sauce and lay them over the top of your casserole. Pour any remaining green sauce over the top. If there's a lot, use a spatula to help the sauce travel into the casserole. Sprinkle with cheese, dot with 1/4 cup sour cream.

5. Bake enchiladas for about 30 minutes, until casserole is merrily bubbling and cheese is slightly browned. Let it all set for about 5 minutes.

Garnish with salsa, more sour cream, and cilantro, if you like it.

Serves 4-6 depending on how hungry you all are.


Monday, August 29, 2011

A New Mexico Newbee Roasts Green Chiles

It's chile harvest season in New Mexico and it's a big deal.  On street corners, in grocery store parking lots and alongside the roads are trucks and tables piled with bags and baskets of large green chiles, just picked and ready for roasting either at home or right there. Last year in Albuquerque at upscale ABQ Uptown mall, there were chile roasters there, too. No one is too fancy for green chile in New Mexico.

Plastic bags with just roasted chile, bags and baskets of fresh chile.
 Heck, even Wal-Mart sells chiles with a guy roasting them for you right outside the store.


 The smell of roasting chiles is a reminder that fall is coming and it's time, like squirrels do with nuts, to stock up on New Mexico's favorite food. There are lines of people waiting for their chiles and folks will roast them right there. Most people are going for a year's worth of chile and since chile is in or on most foods most days, that's a lot of green.

My mom and dad would bring home fresh green chiles from vacations, roast them in their broiler, and freeze them, but I never got into all that, content to be gifted some frozen care packages when I visited. I had a "grasshopper and the ants" mentality when it came to green chiles.

But I figured, what the heck, I might as well take advantage of all these fresh chiles, so I bought a basket of chiles for ten dollars and decided to roast them myself.


It was a splendid day for chile roasting: temperate weather and the rain had just stopped.


So I popped them on the Weber. I wanted to grill the chiles until the skin was blistered because that's how you get the skins off.


These were about ready. I didn't realize that they might explode, and a couple times I ended up breathing chile fumes from an explosion. Now I need respiratory therapy. Note to self: 1. Don't lean over the barbie and 2. Poke a knife in each chile before you pop it on the grill.

It took about 5 minutes for the chiles to be nice and blistered. From there I put them in a large bowl with a damp towel over the top so they could sweat. After I was all done roasting, I took the chiles to the sink where I pulled out the stems, shook out the seeds, and packaged them in plastic bags. Tom was upstairs in bed by this time. "What the hell are you doing down there? It smells like a chile factory!"

By the time I was done, there were 22 small and 2 large plastic storage bags filled and ready for the freezer. I think we have a year's worth.

And maybe next chile harvest season I'll have the guy with the roasting basket do it for me!


Tuesday, August 9, 2011

Growing Dome Update-So Far, Not Too Shabby

The Growing Dome has been up and running since the first week in May when I planted our inaugural crop of veggies. We chose the 18 foot diameter dome which is appropriate for a family of 2-3, but the dome people didn't account for hungry beef cattle who stick their heads into the side vents for a little snack. That's why some of the stuff I planted had an early demise.

This should be remedied soon, though, since we bought the posts and cement for a fence to keep out those living lawn mowers we call The Angus Boys. The plan is for an outside garden area along with a bee yard,  surrounded with a 5 foot barbed wire fence. When the bees arrive, Meg the Beemaster suggests electrifying the fence at night to keep out hungry honey hunting bears.

Even though there have been Angus Boy raids on broccoli, green beans, pepper and cucumber plants, I still consider the garden inside the dome a success. Come on in and I'll give you a tour.

Inside we have added a layer of shredded bark mulch to the floor, which is over a layer of metal mesh hardware cloth and weed barrier cloth. Makes it homey, I think.


I have the Earthboxes in front of the water tank. The tomatoes in there haven't done as well as the ones in planter beds along the perimeter. Could it be because I didn't follow the replanting instructions and forgot to add fertilizer? Nonetheless, we have had a supply of cherry and yellow pear tomatoes and all the cinnamon basil I want. I'm making pesto this week. On the right side are jalapenos and an Early Girl tomato plant that grew so big I had to prune it at the top and sides. Next year I will have taller tomato cages.


We've had a steady stream of these Early Girl tomatoes for the past month. I've had one of the big yellow tomatoes on another plant and more are ripening. I'm starting some arctic-cool weather tomato plants this week. We'll see how long I can extend the tomato season. I know I am insane to try this, but why the heck not?


This variety, Big Jim chile, is in the Guinness Book of World Records for being the largest pepper, growing to 12 inches long. They are mildly hot but aren't ready yet. So I can't tell you how hot that really means. I'll bet they will be awesome stuffed with a picadillo mixture of some sort.


These are the last 2 or 3 cucumber plants (and we've had a couple cukes a week), covered with blossoms and flowers. The other cuke plants were to the right until Mignon, the midget marauder, stuck his head in the vent. In front are the purple green beans, which we have eaten every which way. They've been producing for the past month and a half and I think this week I will pick the last of them since they are getting tired.


We have new green beans coming up for the next go-round on this side and its opposite. In the back are carrots. I just broadcast the seeds instead of making neat little rows.  I won't do that next time because it's too chaotic and the tops are a tangled mess, even though I thinned them. There's a new zucchini plant in there, too, along with two remaining yellow pepper plants. Earlier some cilantro grew there and now it's pesto, in the freezer.


The dome's water tank keeps it cooler, and since Tom hooked up the solar water pump, there's a peaceful sense of tranquility. Nothing like water therapy to make a body feel good.

Especially after you've had plenty to eat and drink.


Friday, April 29, 2011

PieTown's New Mexican Apple Pie

Photo courtesy of Molly Boyle
PieTown is right smack on the Continental Divide, located in West-Central New Mexico, in Catron County. Tom and I drove through this dusty, two restaurant town about ten years ago, starving, on a Saturday afternoon. Pretty much all we could see were the two places to eat and nothing else. It was just a wide place on the road. 

We stopped at a place called Daily Pie because there was an assortment of cars in the parking lot, most of them with local license plates. (That's how you find good restaurants while on the road.) Saturday was special in PieTown because the only meal served that day was dinner: Your choice of beef, chicken, or ham, with mashed potatoes, green beans, salad, and of course, for dessert, pie. It was a basic, down-home meal, and everyone in the dining room was loving it: forest service workers, ranchers, sunburned bicyclists, elderly couples who probably make the drive each Saturday for diversion, and travelers like ourselves. 

The pie was excellent: I had the New Mexican apple pie and took a slice of banana cream to go. It was a decadent breakfast treat the next morning. Later, I found an article in Smithsonian magazine about PieTown's history and felt right there on the cutting edge of coolness.

This New Mexican Apple Pie is a family favorite and we've made it for the past couple Thanksgiving dinners. It's sweet and spicy at the same time. There's just a hint of green chile.....it's kind of mysterious and people wonder what they are tasting. If you are in a hurry, those Pillsbury Ready Crusts work just fine. P.S. The Daily Pie Cafe has changed its name to Pie Town Cafe The Good Pie Cafe if you decide to go looking for it.

 New Mexican Apple Pie (From Daily Pie Café, Pie Town, NM)

Ingredients
4 large granny smith apples, peeled, cored and sliced
1 c. sugar
4 T. flour
2 t. cinnamon
¾ t. nutmeg
2 ounces of New Mexican (Hatch) green chili, hot or mild or more! to taste (canned or frozen chiles are okay)
2 ounces of pinon (pine) nuts (I toast mine in a skillet, but you  don't have to)
1 T lemon juice

Peel, core and put apple slices into large mixing bowl. Add all other ingredients mix well.
Set aside to blend flavors while the crust is being prepared.
Pastry crust (makes four crusts)
This recipe will use two crusts.
The other two can be frozen for future use, always handy and makes for a speedy pie.

3 cups of flour
¼ t. baking powder
1 t. salt
½ c. salted butter
½ c. shortening
1 egg
1 T. white vinegar
1/2 c. ice cold water
Combine flour, baking powder and salt. Cut in butter and shortening to pea sized pieces with pastry knife or fork and knife(do not use your hands yet). In separate bowl, mix egg, vinegar and water. Add wet mix to flour mixture small amounts at a time and blend with spoon or pastry cutter until dry ingredients are moist and form a ball (more or less water may have to be added depending on moisture content of flour).

Roll into a ball wrap with plastic wrap and refrigerate 1 hour. Divide dough into four sections. Roll out one section on a floured board to fit 9” pie pan. Put crust into pan. Place apple mix , mounded in the center. Top with one rolled section of crust. Flute edges, cut vent holes into top crust. Brush with egg wash and sprinkle natural sugar on top (optional). Bake at 425 degrees for 15 minutes, turn, then 400 degrees for 45 minutes to an one hour. Pie is done when golden brown and juices bubble thickly around the outer edge. Serve with vanilla ice cream (highly suggested).

Friday, April 22, 2011

Grilled Cheese and Green Chile Sandwiches

Grilled cheese sandwiches seem to be making a comeback, even going so far as to have entire lunch trucks devoted to this gooey, savory comfort food.

I don't know about your childhood, but grilled cheese and tomato soup was the go-to meal at our place if someone wanted to feel cozy and satisfied, second only to Kraft macaroni and cheese.


 Many Northern New Mexico chefs have tweaked the bland, comforting grilled cheese sandwich recipe by adding chopped green chiles, which definitely makes sense if you live in a place where the official state question is, "Red or green?"

An aside: Green chiles shouldn't be confused with jalapeno chiles. Green chiles, like those canned ones from Hatch or Ortega are what I'm talking about: fairly mild, but with a little spicy flavor. Since we moved to The Land of Red or Green, or both, I have been exposed to Bueno frozen green chiles at the supermarket and they are my favorite, for now.

Of course, you can't beat roasted chiles that you buy in the fall. People around here buy chiles from their favorite roaster guy and peel and freeze humongous amounts for use througout the year. I'm not there, yet, but maybe this fall.

Anyway, here's a grilled cheese recipe to add some spice to your life. It uses canned chiles, but if you have fresh ones in the freezer, get them out and chop-em-up. It will be chile roasting time before you know it, so make room in your freezer!

Green Chile Grilled Cheese Sandwich (This makes 2 sandwiches)

4 slices bread
4 slices American, Jack, or Cheddar cheese
2 T butter or margaring
4 oz can chopped green chiles, or to taste
suggested additions: sliced tomato, cooked bacon, sliced ham, avocado, mayo, mustard

1. Butter 2 slices of bread and place them,  buttered side down, on a comal or grill or in a pan over medium/low heat.

2. Put 2 slices of cheese on each piece of bread. Sprinkle chiles on cheese. Add your other stuff if you are customizing your sammies.

3. Top with the other slices of bread. Butter the top.

4. Grill until your bread is golden brown and the cheese is getting melty. Flip your sandwiches. Grill the other side. Don't get distracted and let it burn.

5. Cut in half to appreciate the beautiful layered, cheesy delight you have made. Enjoy.